Adding a new risk assessment
To add a new risk assessment to the system, access the Utilities module, Tools tab, select the menu option Risk Review Editor. The following screen will open and your current risk questions by review type and entity type will be displayed. For example:

The top section of the screen displays the current risk assessment types you already have set-up within Troika. For the highlighted type selected at the top, the second half of the screen then displays the questions for this review only. You can set up as many risk assessments types for each type of client. Only the reviews marked as ‘enabled’ are accessible by users to add to a client within Troika Administrator.

To add a new risk review, scroll to the bottom of the first pane (the table displayed) and highlight the blank row at the bottom of the table next to the black arrow. A pencil icon will be displayed as you add a new record. Enter a name for the risk assessment questionnaire; for example, ‘Annual trust risk assessment’ or ‘New Client Acceptance’. Next, select the client type the risk assessment is for from the drop down box.
The next field is to select either ‘enabled’ or ‘disabled’. You can flag redundant or inactive review types as ‘disabled’ to prevent users adding further reviews of this type.
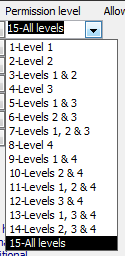
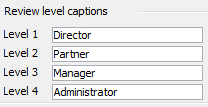
Enter the risk limit score for this review and also ‘level’. The risk limit is a numeric value which represents a limit for the total allowable score for the review. The risk levels relate to the review permissions assigned to each user in the menu option Review Permissions. Each user completing reviews will need to be assigned a permission level and this controls which risk assessments can be completed be each user. Select ’15 – All level’ to allow all users to complete risk reviews.
Click on the pencil icon to save the new review.
Adding new risk assessment questions
To add risk questions to this review, scroll to the bottom of the second pane and highlight the blank row at the top of the table, next to the black arrow. A pencil icon will be displayed as you add a new record.
The order value is the order in which the question will appear in the review. We would suggest increments of 5 for this value for each question; this will allow you to add new questions In between existing ones easily in the future.
Using the tab key or the mouse, move to the next field which is the question text. Enter the question in this column.
The URL field will also allow you to add an optional website address or location of any document/information that relates to the question. The user can then easily select this website or document when answering this question.
For example:

The next field to populate for the selected question is the type of question from the drop down box. The choices are lookup, text, value or date. This controls the type of information the question will prompt the user to respond with.
- Lookup – this will require the user to make a selection from a drop down list of standard responses.
- Text – this will require the user to respond with some written text.
- Value – this will require the user to respond with a value.
- Date – this will require the user to respond with a date.
Where the question type ‘lookup’ has been selected, the next column ‘lookup values’ must be used. Either double click on this field or click the Edit button.
The ‘Question Lookups’ screen will then open, to allow you to enter a row for each response to be presented to the user for this question. For example:

- The description field is the text the user will see in the drop down lists of possible responses to the question.
- Enter a risk weighting score for this question response. A user responding with this answer will add the value entered here into the risk score.
- Enter further text to describe the lookup response in more detail in the ‘risk description’ field.
- Enter further text to describe the response in the ‘standard response’ field. This is presented to the user as part of the review and can be used to explain to the person completing the review any specific actions that need to take place.
- ‘Min. Overall compliance risk’(optional); this allows the risk review to automatically set the calculated risk level to a minimum level regardless of the score achieved by other questions. For example, entering the level ‘High’ might be the minimum level for the whole review if the question was ‘Is the beneficial owner a Politically Exposed Person?’ Therefore if the other questions only equated to a ‘low’ risk score in total for the whole review, a response to this particular question will result in a high risk score. See the section below for further details on how to set the ‘compliance risk levels’.
Add additional rows to this screen for each response that should be made available for this question. Close the questions lookup screen.
The next field to enter for this question is the ‘calculate risk’ checkbox. You can include as many or as few questions within the whole review; however only those questions checked will be included in the overall risk score.
The last field to enter for this question is the ‘risk task’ checkbox. Enabling this feature for the question will automatically create a standard ‘task’ record for specific users of Troika. Please contact support for additional details of how to enable this feature.
Setting the compliance risk levels for this review type
For the review being created, add a compliance risk level for each tier of risk score being calculated for the whole review. Click on the add button to add the following details:
- Level. This is a numeric value which represents the risk level (and the order displayed).
- Risk Weighting Ceiling. This is the total score of the review that equates to this risk level being calculated when completing the risk assessment questions. For example, if the score of 45 was calculated by the user completing a review, level 4 (High-Medium) would be recorded as the compliance risk level for the client, in the example below.
- Description. Enter the description to display when completing the risk assessment.
- Client Review Frq. (mths). Enter the frequency/number of months the client review process for the selected client should be repeated. When completing a client review in Troika, the ‘Next Review Date’ will be rolled forward by the number of months entered here for the risk level calculated by the most recent completed risk assessment.
- Management of Risk. Enter text to present to the user when completing the risk assessment to explain how this level of risk should be managed.
Example compliance risk level:

The risk review set-up is now complete, and a client risk assessment can be completed in the Troika Administrator module, Client tab, and the menu option Risk Assessment – Add.
In the event of any difficulty in selecting an assessment (warning: You have insufficient rights to edit this review.), please refer to the following for more information on adjusting Review Permissions:
Adjusting Review Permissions (Client Reviews and Risk Assessments)
These notes are applicable from Troika release 2.08.018.